How to use Tradovate on TradingView is the process of connecting your Tradovate account to TradingView’s powerful platform, allowing you to trade futures directly from its advanced charts. This integration streamlines your entire trading workflow.
This guide, brought to you by H2T Funding, will walk you through every step. We cover the full process, from login and connection to placing orders and troubleshooting common errors, making it the perfect resource for both new traders and seasoned prop firm professionals.
Key Takeaways
- Tradovate offers an official connection with TradingView, allowing you to trade futures contracts without leaving the charting platform. This creates a more efficient trading environment.
- You can connect various accounts, including demo (sim), live funded, and popular prop firm accounts from providers like Apex and Topstep.
- It’s crucial to understand that TradingView serves as the front-end for placing trades. All orders, risk rules, and account data are still managed and executed by Tradovate.
- Issues like the “Non-tradable symbol” error or the “Tradovate not working” problem typically have simple fixes related to account permissions or market data, which this guide addresses.
1. How to use Tradovate on TradingView (Overview & requirements)
To use Tradovate on TradingView, you primarily need a valid Tradovate account (demo or live), a personal TradingView account, and the TradingView Add-on activated within your Tradovate settings. This setup combines a top-tier broker with an elite charting platform, creating a powerful combination for futures traders.
It is essential to understand the roles of each platform. Tradovate acts as the futures broker, responsible for executing your trades, managing your account balance, and enforcing risk parameters. All your orders are processed through their infrastructure.
On the other hand, TradingView functions as the front-end interface. Its advanced charting tools, indicators, and user-friendly design allow you to analyze the market and place orders directly from the chart. However, it does not replace your broker; it simply provides a more intuitive way to interact with it.
This integration is particularly beneficial for day traders, scalpers, and prop firm traders who rely on precise entries and exits based on price action. By understanding that Tradovate handles the “back-end” while TradingView manages the “front-end,” you can avoid common connection issues and trade more effectively.
2. Can you connect Tradovate to TradingView?
Yes, Tradovate offers a seamless and official integration with TradingView. This allows traders to link their brokerage accounts directly to the charting platform, eliminating the need to switch between different applications to analyze markets and execute trades.
The connection is established directly through the Trading Panel feature within the TradingView platform. This integration supports both Live and Demo accounts, making it versatile for traders at all levels of experience.
Furthermore, it is fully compatible with accounts from major prop firms that use Tradovate, such as Apex Trader Funding or Topstep. A critical point to remember is that all of Tradovate’s risk rules and account parameters remain active. TradingView acts as a visual front-end, but your broker’s system still governs every trade.
In short, this is not a third-party workaround but an officially supported feature. It provides a reliable and efficient way to enhance your futures trading workflow.
3. How to connect Tradovate to TradingView step by step
Please note: This guide is based on the Tradovate Web Trader interface. The location of buttons and menus may vary slightly if you are using the desktop or mobile application.
Connecting your accounts is a straightforward process that takes just a few minutes. By following these three simple steps, you can ensure a smooth and secure integration, allowing you to focus on your trading strategy.
Quick checklist before you start:
- Step 1: Prepare your Tradovate account
- Step 2: Activate the TradingView add-on in Tradovate
- Step 3: Step 3 – TradingView Tradovate login
3.1. Step 1 – Prepare your Tradovate account
Before connecting to TradingView, you must ensure your Tradovate account is set up correctly. This preparation prevents the most common login and data errors later on.
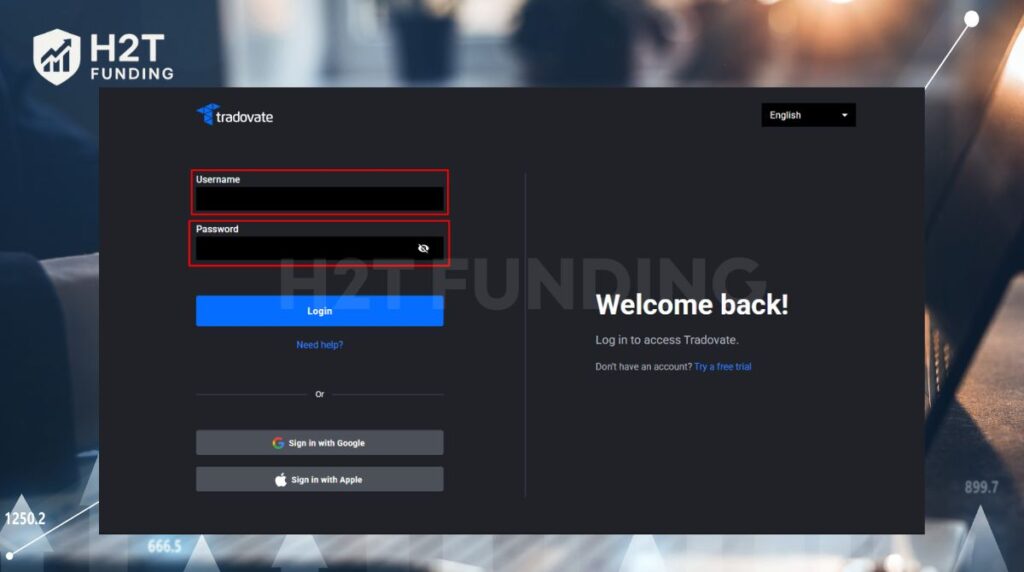
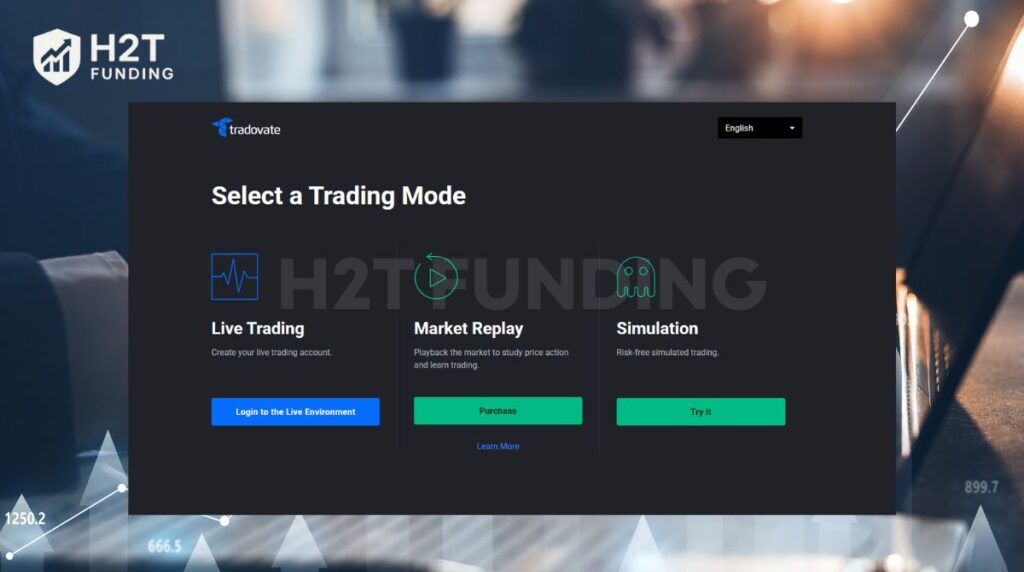
First, log in to the Tradovate Web Trader using the credentials provided to you. It is crucial to select the correct environment when prompted: choose ‘Simulation’ for a demo or prop firm evaluation account, and ‘Live’ for a real, funded account.
Finally, verify that your market data subscription for futures is active within Tradovate, as this is required to see live prices on TradingView.
3.2. Step 2 – Activate TradingView add-on in Tradovate
Next, you need to enable the official TradingView integration from within your Tradovate account settings. This step gives TradingView permission to access your account.
Navigate to the Application Settings icon, typically located in the top-right corner of the Tradovate platform. Inside the settings menu, click on the Add-ons tab.
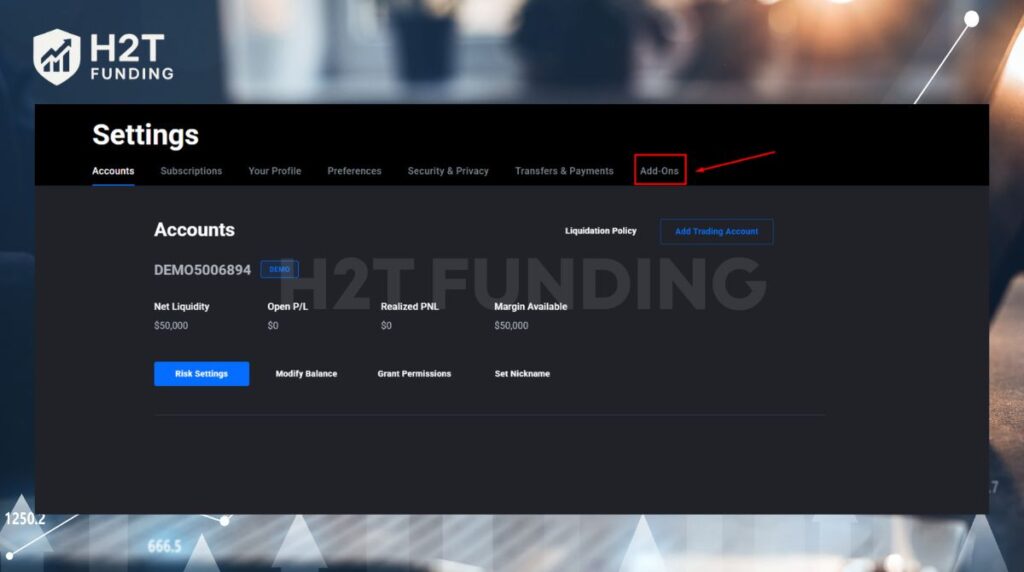
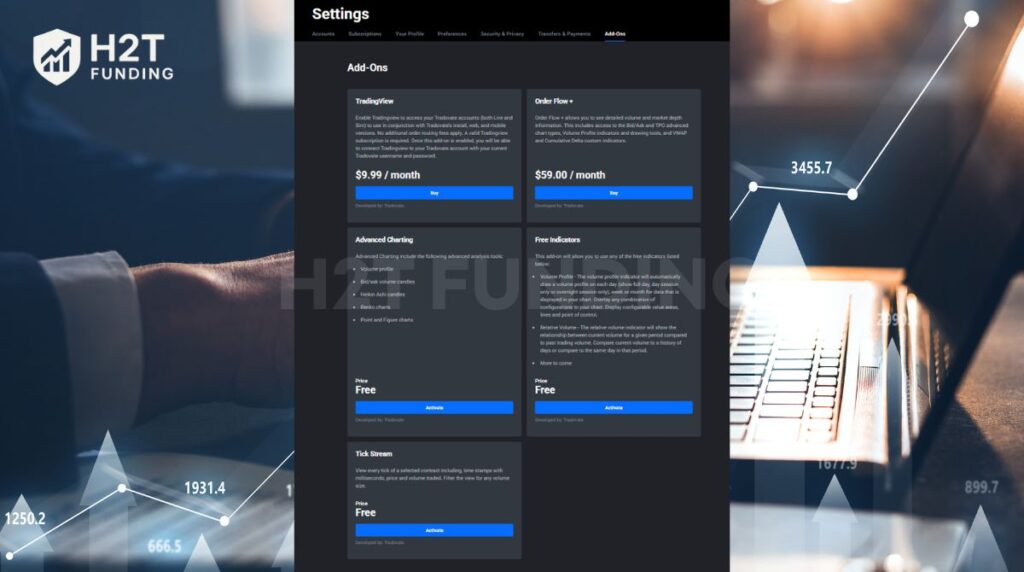
Scroll down to find the TradingView integration and click Activate. For many prop firm accounts, this add-on is included for free. For personal accounts, a separate monthly fee may be required.
For the most detailed and up-to-date instructions, we recommend consulting the official support documentation directly from Tradovate or your specific prop firm.
3.3. Step 3 – TradingView Tradovate login
With the add-on activated, the final step is to link the accounts from the TradingView platform.
Start by logging into your personal TradingView account. At the bottom of your screen, open the Trading Panel. You will see a list of available brokers; find and select Tradovate.

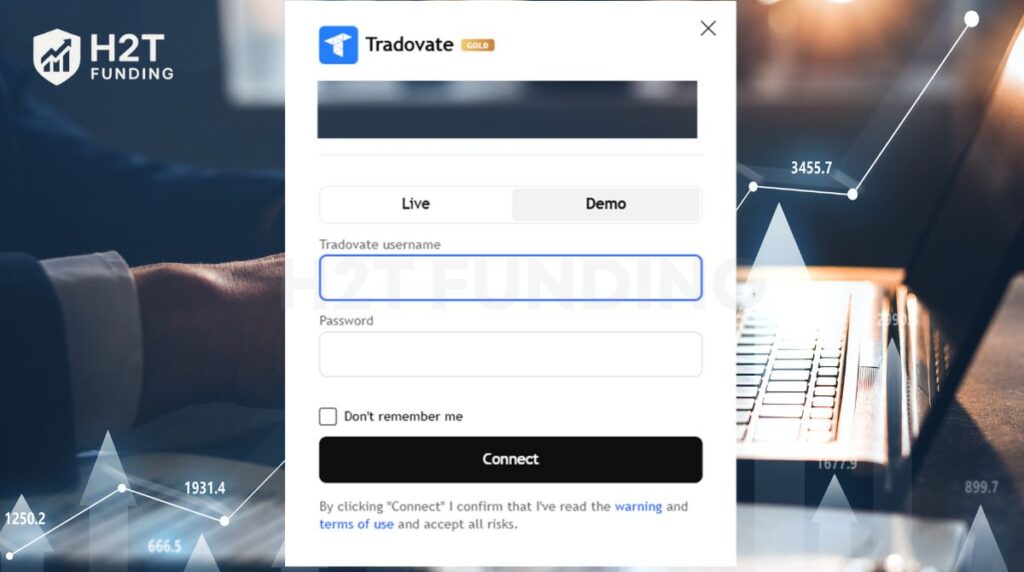
A login window will appear. Enter your Tradovate username and password, making sure to select the corresponding Demo or Live environment. Click Connect.
After these steps, your Tradovate account will appear directly in the TradingView panel, ready for you to begin trading.
Read more:
4. How to set stop loss on TradingView Tradovate
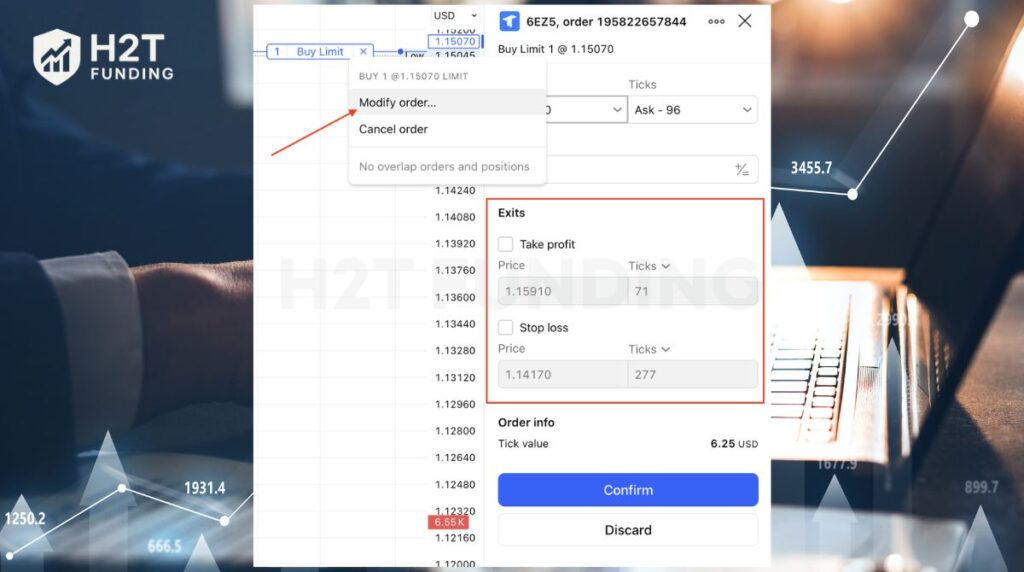
The most important rule to understand is that you can only add a Stop Loss and Take Profit when you are first placing an order. This must be done through the detailed Order Panel.
It is not possible to add a stop loss to a position that is already running. If you right-click on an active trade and select “Modify Order,” you will find that the options for Stop Loss and Take Profit are grayed out and cannot be used. This design forces you to define your risk from the very beginning.
Here is the correct process:
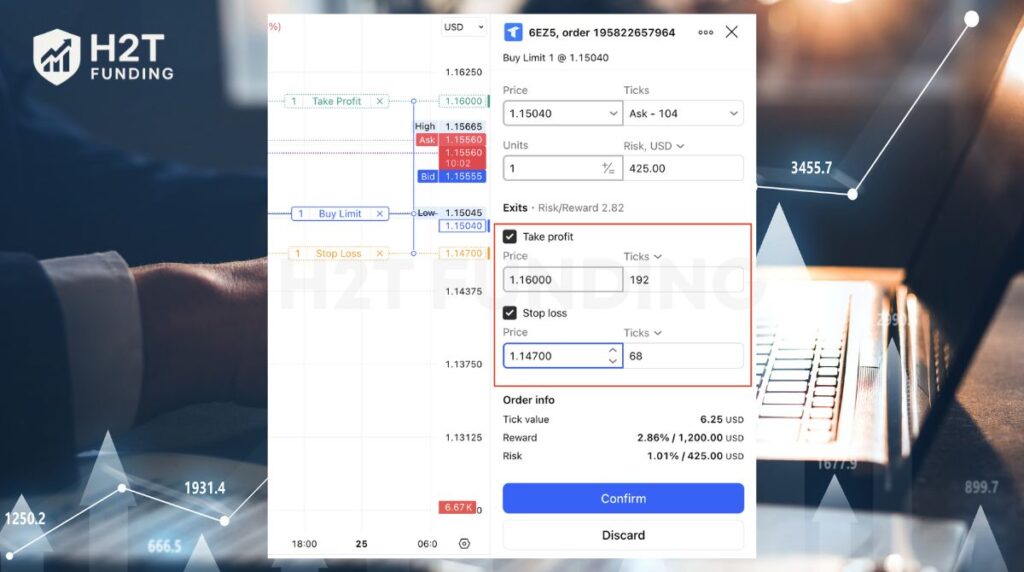
- Open the Order Panel by right-clicking on your chart and choosing “Create new order.”
- In this window, define your entry order (e.g., Buy Limit).
- Before you submit the trade, you must check the boxes for “Stop loss” and “Take profit” and set your specific price levels. This creates a bracket order.
- Once the order is placed, you can easily modify the Stop Loss by clicking and dragging its line directly on the chart. Tradovate’s system supports this on-the-fly adjustment for existing orders.
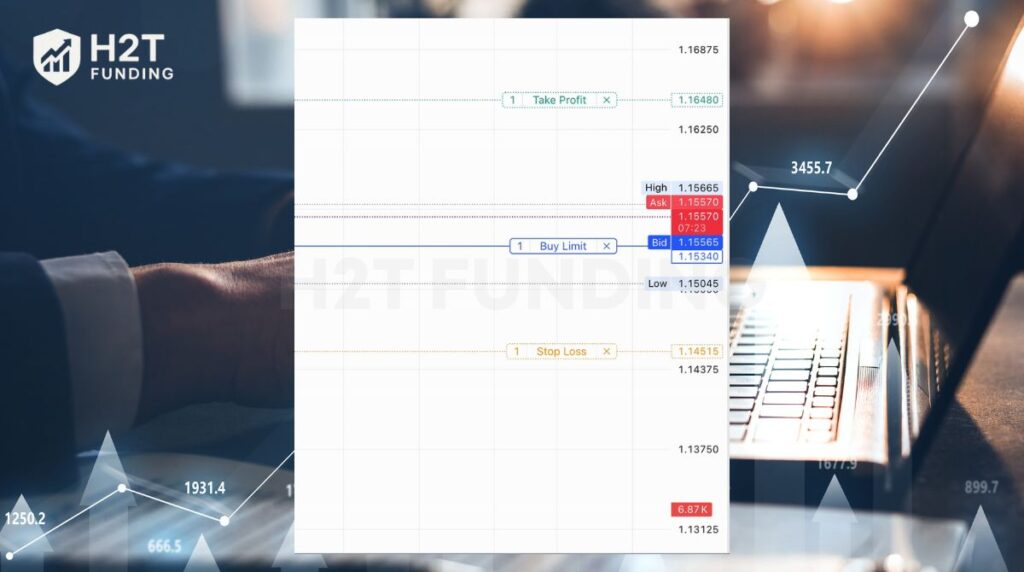
This two-step process stops at entry and visually combines Tradovate’s strict risk policy with TradingView’s flexible interface. It forces a disciplined approach, ensuring every trade you take is protected from the very beginning.
5. How to connect Tradovate to TradingView Apex & prop firms
Connecting a prop firm account, such as one from Apex or Topstep, follows the same core process but with a few key differences. You must use the specific credentials provided by the firm, and the TradingView add-on is often included for free.
To ensure a successful connection, you must have an active, tradable account from your prop firm. Quick checklist before you start:
- Step 1: Activate the Free Add-On in Tradovate
- Step 2: Connect Using Prop Firm Credentials in TradingView
5.1. Step 1 – Activate the Free Add-On in Tradovate
First, you need to enable the TradingView connection using the account details your prop firm provided.
- Log in to the Tradovate platform with the username and password given to you by the prop firm (e.g., from your Apex Trader Funding dashboard).
- Navigate to Application Settings in the top-right corner.
- Click on the Add-Ons tab.
- Find the TradingView integration and click Activate. For most prop firms, this is free and included with your subscription. Note that it can sometimes take a few hours for the activation to complete.
- Once activated, log out and log back into Tradovate to ensure the change takes effect.
5.2. Step 2 – Connect Using Prop Firm Credentials in TradingView
Now, head over to the TradingView platform to complete the link.
- Log in to your personal TradingView account.
- Open the Trading Panel located at the bottom of your chart.
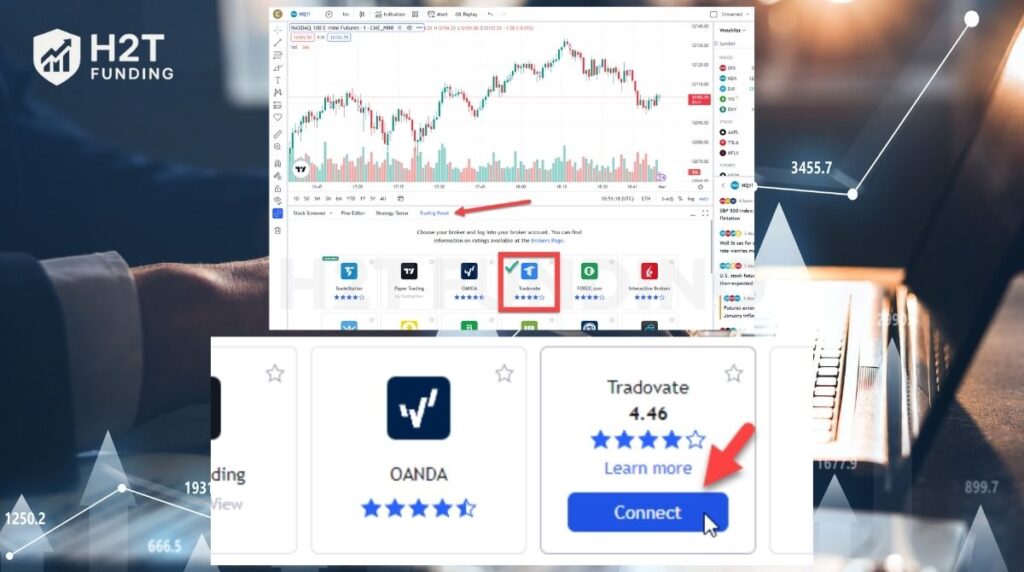
- Select Tradovate from the list of brokers and click Connect.
- A login window will appear. Here, you must enter the Tradovate username and password provided by your prop firm.
- Crucially, select the Demo environment. All prop firm evaluations and funded accounts operate in a simulated environment.
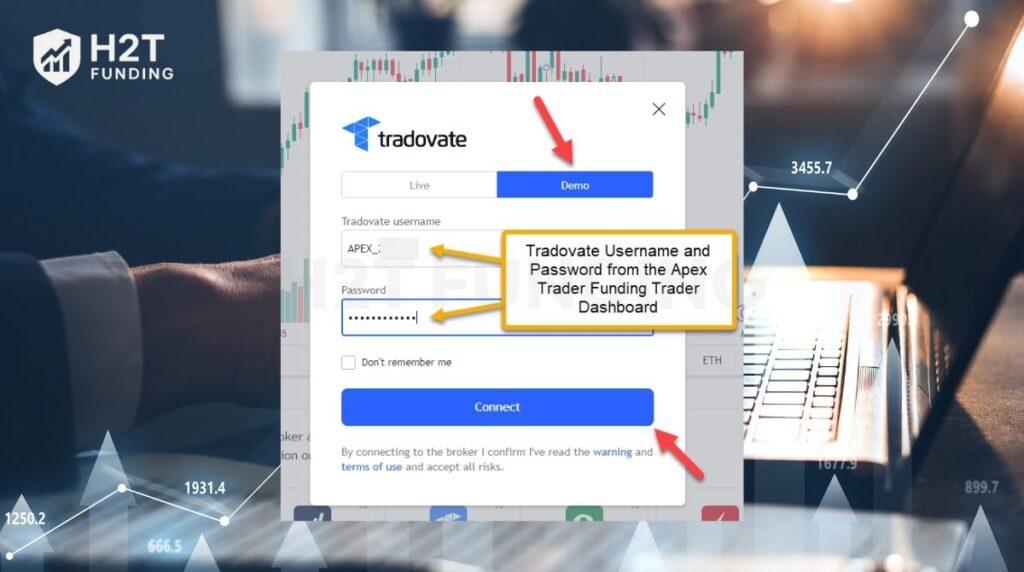
- Click Connect. Your prop firm account will now appear in the Trading Panel, ready for trading.
It is vital that you follow your prop firm’s specific rules on risk and trading conduct. While you are using TradingView as an interface, all trading activity is still governed and monitored by your funding provider.
6. Copy trade Tradovate on TradingView – Is it possible?
Directly, no. The official Tradovate integration within TradingView does not offer a native or built-in function for copy trading. This is a common feature request from traders who want to replicate trades across multiple accounts without leaving their charts.
Many traders are familiar with Tradovate’s own Group Trade feature, which is designed for multi-account management. However, it is crucial to understand that this tool is only available within the Tradovate platform itself. It cannot be accessed or used when you are placing orders through the TradingView interface.
How to use Tradovate trade copier on TradingView? The only viable solutions involve using external, third-party copy trading software.
Important Disclaimer: Please be aware that these tools are not officially endorsed or supported by either Tradovate or TradingView. Users assume all responsibility for any technical risks, security vulnerabilities, and potential costs associated with these third-party services.
Ultimately, while you can’t use a native feature, copy trading is achievable through these external solutions. It is important to distinguish this from simple multi-account management. For automated trade replication while using TradingView, you will need to rely on one of these specialized third-party services.
7. Common errors & fixes
Encountering an error when connecting or trading can be frustrating, but most issues are easy to solve. The problems usually stem from incorrect settings or account permissions. Here are the most common errors and how to fix them quickly.
7.1. Non-tradable symbol TradingView Tradovate
This is one of the most frequent order rejection messages. It means you are trying to trade an instrument that your account is not authorized for. There are three primary causes:
- Expired Contract: Futures contracts have an expiration date. You may be looking at an old contract (e.g., last month’s ES contract). Make sure you are trading the current, active front-month contract.
- No Market Data: You must have an active market data subscription for the specific exchange (like CME or EUREX) within your Tradovate account. Without it, Tradovate cannot execute the trade.
- Unsupported Instrument: Remember that Tradovate is a futures-only broker. Attempting to trade stocks (like AAPL), crypto, or forex through this connection will result in this error.
7.2. Login failed, or something went wrong
This generic error message usually appears during the initial connection attempt. It almost always points to an issue with your credentials or account status.
- Incorrect Live/Demo Environment: This is the number one cause. If you are logging into a prop firm account, you must select the “Demo” environment. If you are using a personal live account, you must select “Live.” A mismatch will always cause a login failure.
- Social Login Issues: You cannot use Google or Apple social sign-ins to connect to Tradovate within TradingView. You must use your traditional Tradovate username and password. If needed, you can unlink your social account in Tradovate’s settings.
- Unfunded Personal Account: For personal (non-prop firm) accounts, the TradingView add-on and other benefits often require the account to be funded. An unfunded account may not be able to establish a connection.
In our experience, more than 90% of all connection and trading errors are related to either market data access or incorrect login permissions. Double-checking these settings will solve most problems you encounter.
8. Do you have to pay to use Tradovate on TradingView?
Whether you have to pay depends entirely on your account type. The cost structure involves a few key components: the Tradovate add-on, market data, and your TradingView subscription level.
- For Prop Firm Traders: If you are trading with a major prop firm like Apex Trader Funding or Topstep, the TradingView add-on is almost always included for free. These firms provide access as part of your evaluation fee, so you do not need to purchase it separately.
- For Personal Accounts: If you have a personal, funded Tradovate account, you might need to subscribe to the TradingView add-on. This is a monthly fee, often around $9.99, charged by Tradovate to enable the connection. This fee links your live and demo accounts to the TradingView platform.
- TradingView Subscription: You can use the integration with a free TradingView account. However, users without a paid TradingView plan may experience a 5-second delay on their charts, even if they have a real-time data feed from Tradovate. A paid TradingView subscription (Pro, Pro+, etc.) is required for a truly real-time charting experience.
In conclusion, the total cost is variable. Prop firm traders often only need to consider their TradingView subscription level, while individual traders must also account for the Tradovate add-on and market data fees.
9. FAQs – Tradovate TradingView questions traders ask
To trade futures on TradingView, you must connect to a compatible futures broker. Open the “Trading Panel” at the bottom of your chart, select a broker like Tradovate, and log in. This allows you to execute trades directly from TradingView’s advanced charting interface.
First, ensure the TradingView add-on is activated within your broker’s settings (e.g., in Tradovate’s Application Settings). Then, go to the Trading Panel in TradingView, find and select your broker, and enter your account username and password.
The most common cause is selecting the wrong environment. Prop firm and demo accounts must use the “Demo” option, while personally funded accounts use “Live”. Other issues include trying to use a social login (Google/Apple) or having an unfunded personal account that requires funding to activate the feature.
First, confirm your login credentials and that the Live/Demo environment is correct. If you can log in but can’t place trades, check that you have an active market data subscription in your Tradovate account and are trading a valid, non-expired futures contract.
This error means you are trying to trade an instrument your account is not permitted to trade. This is typically caused by an expired futures contract, a missing market data subscription for that specific product, or an attempt to trade non-futures instruments like stocks or forex.
The process is the same as on a desktop. Open the TradingView app, tap on a chart, open the Trading Panel, select Tradovate from the broker list, and log in with your credentials, making sure to choose the correct environment (Demo or Live).
First, log in to Tradovate using your Apex credentials and activate the free TradingView add-on in the settings. Then, in TradingView’s Trading Panel, select Tradovate, enter your Apex login details, and be sure to choose the “Demo” environment.
No, not with a built-in feature. The official integration does not support copy trading or Tradovate’s Group Trade function. To replicate trades, you must use a separate, third-party trade copier software designed to work with TradingView.
You must set your stop loss and take profit when you initiate the trade using the detailed Order Panel. It is not possible to add a stop loss to a position that is already open. However, you can modify an existing stop loss by dragging it on the chart.
No. The Tradovate connection exclusively supports futures trading. You cannot trade other asset classes like stocks, cryptocurrencies, or forex through your Tradovate account on TradingView.
10. Final thoughts
Learning how to use Tradovate on TradingView correctly gives futures traders a significant competitive advantage. This integration allows for faster, more accurate, and more intuitive trading, letting you execute directly from a world-class charting interface. It transforms your ability to react to market movements with precision.
Now that your platform is optimized, the next step is mastering your strategy. To further develop your skills, explore our Prop Firm & Trading Strategies category from H2T Funding for more expert guides and actionable insights to enhance your trading performance.